2 Ways to Change Date and Time of CP PLUS Brand DVR or NVR
In the CCTV Surveillance, DVR or NVR ‘s date and time is a very essential part, if it is nor set properly then might be very difficult to retrieve backup or search playback. Even some time it’s not valid video footage as evidence during legal matters in court too. So always check on DVR’s or NVR’s date and time and keep up to date.
Why need to change date and time from DVR or NVR ?
There are few reasons which cause date and time change in your DVR or NVR.
- device is set on factory default setting
- Device inbuilt cell drain
- By human error mistakenly set wrong date and time
In this article, we are going to see 2 ways to change date and time of CP PLUS DVR or NVR.
Table of Contents
First Method # Through CP PLUS KVMS Pro Free Software
For this method, you need to install CP PLUS KVMS Pro software in your PC or Laptop and then have to add DVR or NVR in this software. If you are not familiar or don’t know how then first follow this blog and steps for the complete Installation process, and then after adding DVR or NVR by following this blog steps
At this stage, I assume your system is equipped with CP Plus KVMS Pro Software and having your DVR or NVR added which you want to change date and time.
You may check the tutorial video for same in the Hindi language
Now, Follow these steps
1 Step # Open Software and Go to Device Config
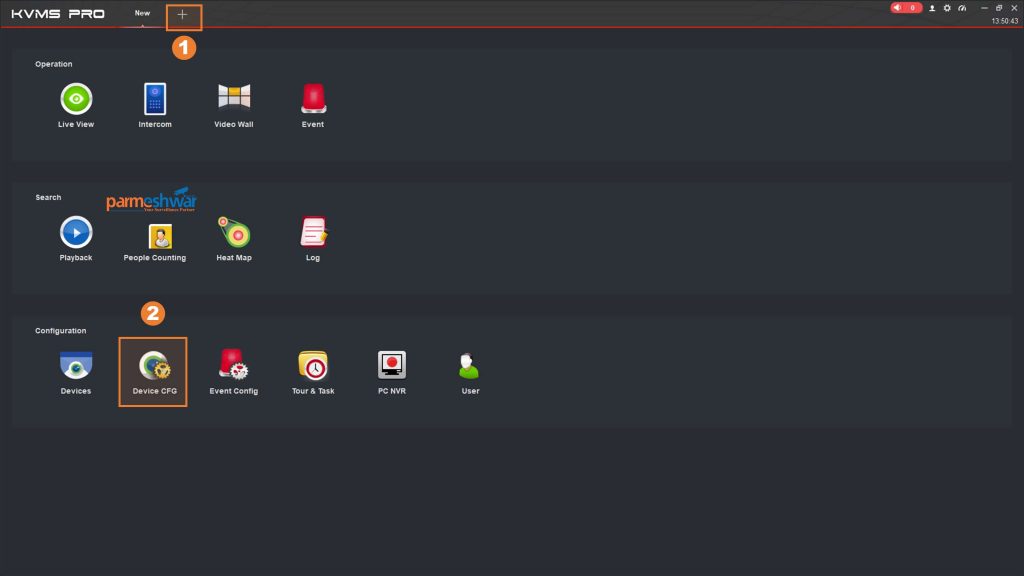
After Opening the software go to New by clicking on the plus sign ( + ) on the header section and then go to the configuration section and click on device cfg. (Device Configuration)
2 Step # Select Device and Open Setting

This is the Device Configuration Screen,
2.1 Double Click on the device to load the device system setting on the right side window
2.2 after loading, click on System option for load further buttons
2.3 Click on “General” Button
3 Step # Go to Date & Time Tab
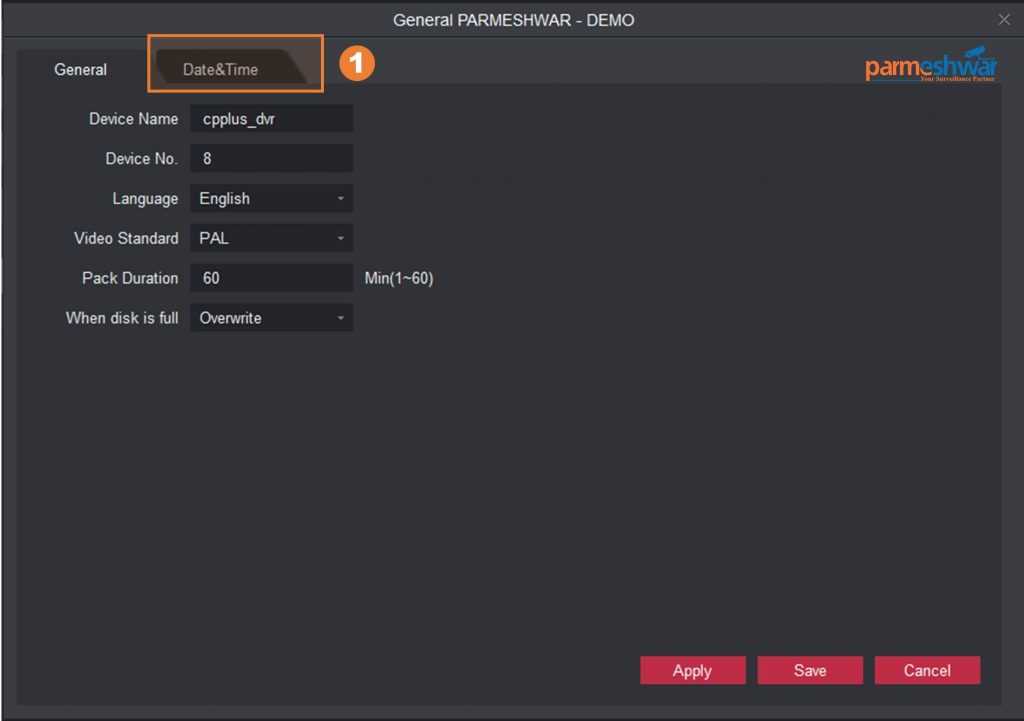
This is the Device General Setting Screen,
3.1 Click on the Date & Time Tab for Explore related Setting
4 Step # Do Final Setting and Save it.
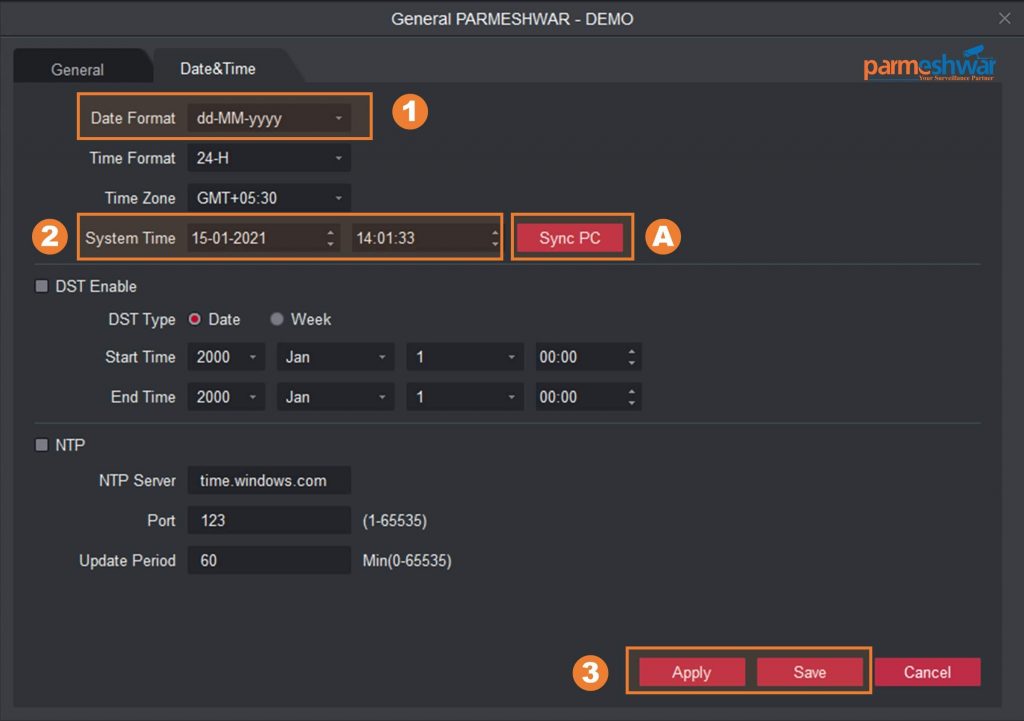
This is the Date and Time related setting Screen
4.1 Select desire date format from the given list
4.2 enter proper date and time or click on “Sync PC” button to enter your current computer date and time here.
4.3 after setting proper date and time or sync with pc, click on the apply button to set date and time and click on the save button for save the configuration in memory.
That’s it, now you have successfully change Date and Time of CP Plus DVR or NVR.
Video Tutorial Method 1
Second Method # Through DVR or NVR‘s Primary Output (TV or Monitor Screen)
For this method, you need to plug your CP Plus DVR or NVR to any monitor screen with HDMI or VGA output
At this stage, I assume your device is connected with any kind of monitor with primary output.
You may check the tutorial video for same in the Hindi language
Now, Follow these steps
1 Step # Go to Main Menu
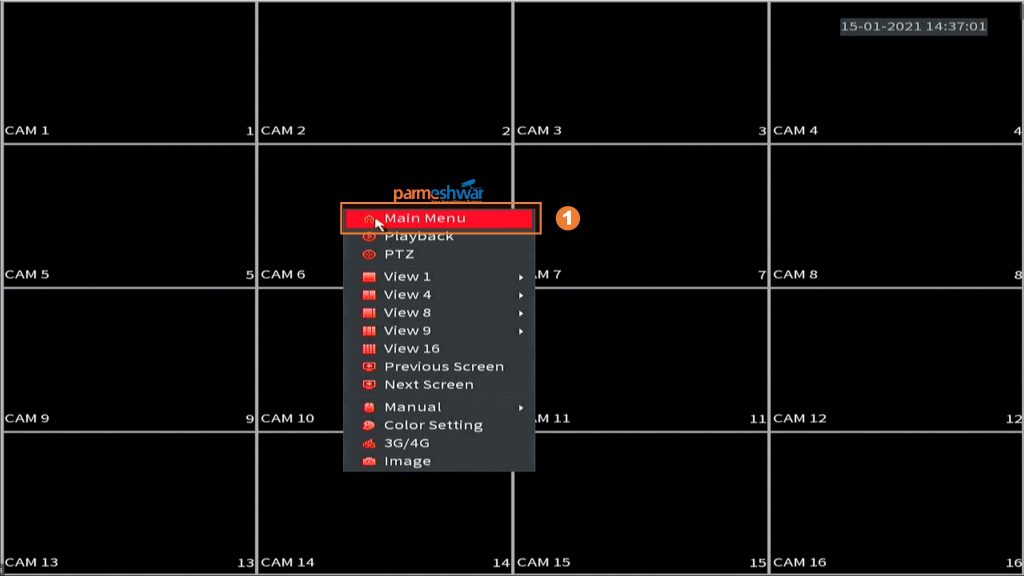
This is the Device Main View Screen,
1.1 Right-click anywhere on the screen and you will find menu popup, Now click on the main menu for further settings.
2 Step # Enter Username and Password
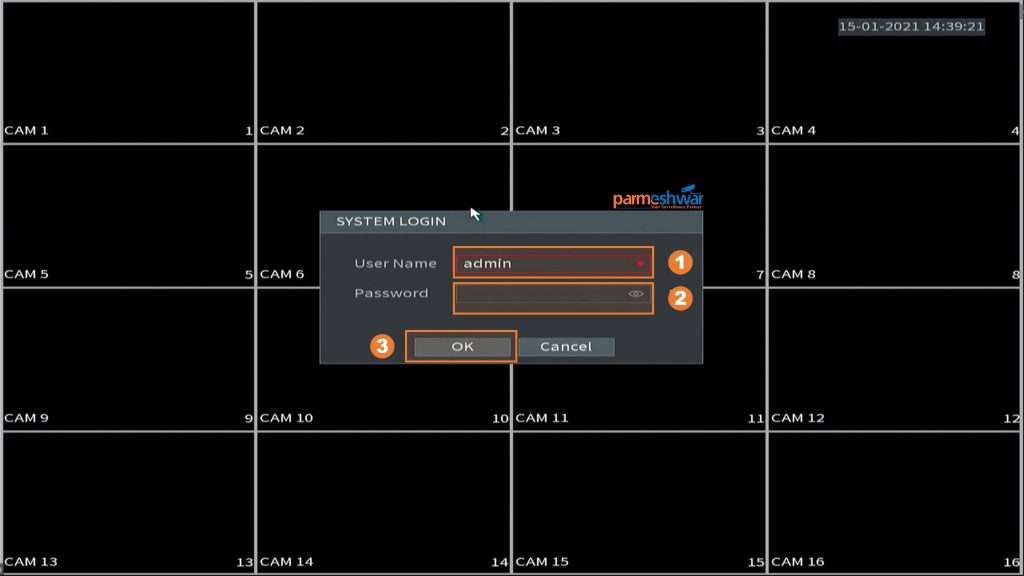
This is the Login Screen for user authentication,
1.1 Select Username from the list.
1.2 Enter Password of the User, if you don’t know the password then contact system installation personnel for it.
1.3 After entering credentials, click okay to enter in the main menu page.
3 Step # Go to Master Setting
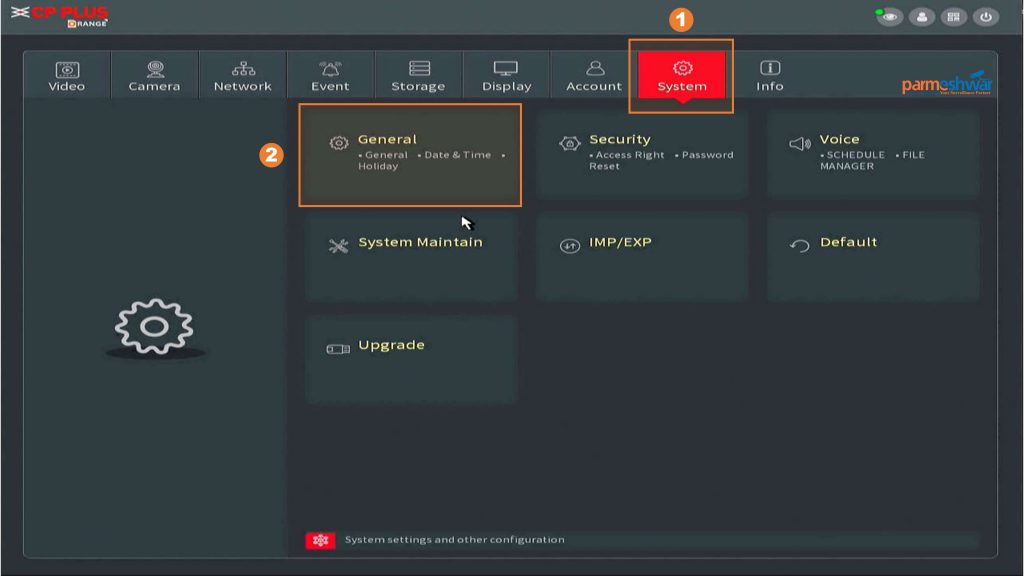
This is the Main Menu Screen for all Settings,
1.1 Click on “System” tab for their sub-menus
1.2 Click on sub-menu call “General” for further setting window
4 Step # Do setting of date and time
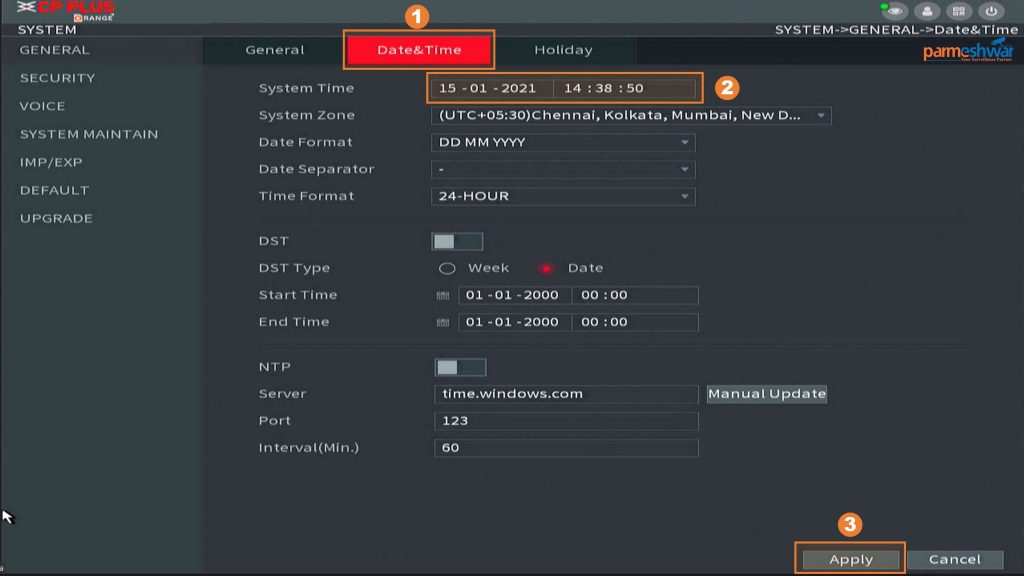
This is the System’s, General Menu Screen,
1.1 Click on “Date & Time” tab for their setting Page
1.2 Set Proper Date and Time, Time Zone, Date Format and date Separator symbol
1.3 Click on the “Apply” button for update and save the settings.
That’s it, Now your DVR or NVR date and time are set properly, come back on the main screen
By right clicking on the screen and checking the updated date and time.
Video Tutorial Method 2
Conclusion :
Date and Time Setting are essential settings in DVR and NVR, which are helpful to search video footage and also used as watermarking on extracted footage/video clips. Hanse, sometimes it’s a crucial role as evidence in law during crime if it is not properly set then the whole system becomes worthless. So, keep an eye on the date and time for avoiding all these problems. No need for any expertise for change date and time of your CP Plus DVR or NVR, there are 2 simple ways to change date and time, first is using supported CP Plus KVMS Pro software and second is DVR or NVR’s primary output through.
Hope, after reading this you are able to change date and time of your DVR or NVR, if not then let me know where you stuck, I am happy to help you.
General Note
This tutorial for CP PLUS DVR and NVR, hanse almost all companies devices have the same kind of process but under the other menu name, so if you work around then i am sure it will be easy.
Share on Social Media
Checkout Video Tutorial
Share On Social Media
We Provide the Best Service in Industry
This is what our customer say…Check out yourself what they have experience.